
Western Blot Best Practices
Your Western Blot Might Be Lying:
3 Essential Controls You Can't Afford to Skip
The Agony of the Ambiguous Blot
Every researcher who has run a Western Blot knows the moment of truth. After hours of careful preparation, gel running, and transferring, you develop the membrane and hold it up to the light. You're looking for a crisp, clear band, but instead, you see… nothing. Or maybe a faint, ghostly signal that might be your protein, or maybe just background noise. Or worse, multiple unexpected bands that throw your entire hypothesis into question.
This sinking feeling is a familiar agony in the lab. It's easy to blame your technique, a buffer made incorrectly, a faulty transfer, an old antibody. But often, the problem isn't the execution; it's the experimental design.
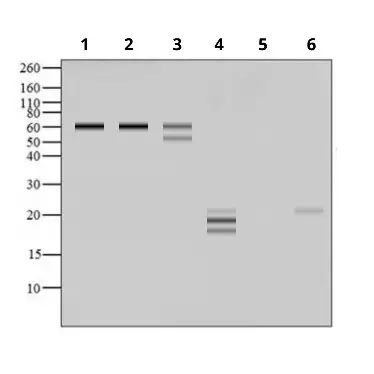
The ambiguity you see on the blot is a direct result of missing information. Without the right context, your blot is just a picture, not a piece of data.
How can you ever be certain what your results mean? How can you confidently say your protein is absent, or that its expression has changed, when so many other variables could be at play?
The solution is not to become a flawless pipetting robot, but to embrace a simple, non-negotiable practice: running the proper controls. They are the essential guardrails that transform an ambiguous blot into an authoritative result.
1 The Sanity Check: The Positive Control
A positive control is a sample that is known to express the protein you are looking for. This could be a purified recombinant protein, an over-expression cell lysate, or a lysate from a well-documented cell line or tissue that has high levels of your target protein. Often, the antibody's datasheet or relevant publications are the best places to identify a suitable control cell line.
The core purpose of the positive control is to validate your entire experimental process. Think of it as the ultimate sanity check. If you get a clear, strong band in your positive control lane, you have proof that your primary and secondary antibodies are active and binding correctly, your buffers are properly formulated, your transfer worked, and your detection reagents are functional. It confirms that the entire system, from start to finish, can detect the protein.
This control answers one of the most critical questions when your experimental lane shows no signal: "Is my protein truly absent, or did my experiment simply fail?" This single lane serves as your defense against a dozen potential failure points listed in every troubleshooting guide—from inactive or expired antibodies to incorrect buffer formulation or poor transfer efficiency. If the positive control works but your sample lane is empty, you can confidently conclude that your protein is not present or is below the detection limit. Without this control, a negative result is completely uninterpretable.
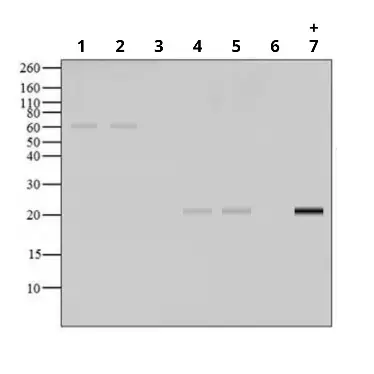
Examples: Over-expressed cell lysate, Endogenous cell line
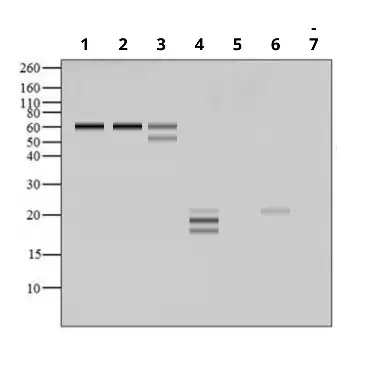
Examples: Knockout cell lysate, Knockdown cell lysate
2 The Specificity Police: The Negative Control
A negative control is a sample that is known not to express your protein of interest. The gold standard for this is a lysate from a knockout or knockdown cell line, but it can also be a tissue or cell line that has been documented to lack the target protein.
The primary function of the negative control is to confirm the specificity of your primary antibody. In an ideal experiment, your antibody should produce absolutely no band in the negative control lane. This proves that the signal you see in your experimental lanes is the result of the antibody binding specifically to your target protein and not to other, non-target proteins that happen to be a similar size.
This is critical for avoiding false positives. It's easy to get excited about a band that appears at the correct molecular weight, but without a negative control, you can't be sure it's your target. This is what stops you from publishing a false positive based on a primary antibody binding to a protein with a similar epitope or a non-specific antibody that happens to recognize a different protein of a similar molecular weight.
A negative control acts as the specificity police, preventing you from misidentifying an impostor band and pursuing a research direction based on flawed data.
3 The Equalizer: The Loading Control
A loading control involves blotting your membrane for a second, different protein that should be present in equal amounts across all your samples. These are typically abundant, ubiquitously expressed "housekeeping" proteins, such as GAPDH or beta-actin, that are essential for basic cell function. It is also critical to choose a loading control protein with a molecular weight that is significantly different from your protein of interest to ensure the bands are easily distinguishable on the blot.
The loading control's essential role is data normalization. It serves as a visual confirmation that you have loaded an equal amount of total protein into each well of your gel and that the protein from each lane has transferred to the membrane with equal efficiency. By comparing the intensity of the loading control band in each lane, you can verify that the starting amounts were consistent.
Crucially, a good loading control's expression must be unaffected by your specific experimental conditions. For example, while Lamin B1 is a common nuclear loading control, it is cleaved during apoptosis and would be an inappropriate choice for experiments studying that process.
This control is indispensable for making valid comparisons between samples. Any observed difference in your target protein's band intensity is meaningless without it. For example, if you see a weaker band in your treated sample compared to your untreated sample, you cannot conclude that the protein expression decreased. The difference could simply be due to loading less total protein in that lane. The loading control equalizes the playing field, ensuring that any changes you see are real biological effects, not just artifacts of inconsistent loading.
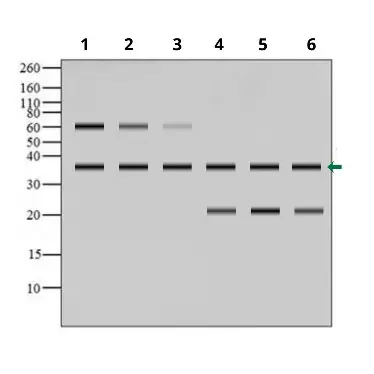
Examples: GAPDH, beta Actin
From Ambiguity to Authority
In the end, running a Western Blot without controls is like navigating without a map. You might arrive at a destination, but you'll have no way of knowing if it's the right one.
Positive, negative, and loading controls are not optional "nice-to-haves" to be included when you have extra space on your gel. They are fundamental, non-negotiable components of a valid scientific experiment. They provide the context needed to transform a potentially misleading image into a piece of reliable, interpretable, and publishable data.
Positive Controls
Validates your entire method
Negative Control
Confirms antibody specificity
Loading Control
Ensures fair comparisons
The next time you plan a blot, don't ask if you have time to include controls.
Ask if you can afford the consequences of not knowing what your results really mean.
